
Quickstart: from install to a live war room
The landfall CLI turns your favorite harness (the coding agent you already use: Claude Code, Codex CLI, VS Code, Cursor, Claude Desktop, Windsurf) into a live investigator in your team's shared war room. Its findings land on the incident timeline in realtime, and it pulls everyone else's discoveries between tasks. Setup is three commands and about five minutes.
What you'll need
- macOS or Linux (amd64 or arm64) with Homebrew, or no toolchain at all if you prefer downloading a prebuilt binary from a tagged release. Windows isn't supported yet.
- A Landfall account and organization. Don't have one? Creating it takes a minute and needs no credit card.
- At least one MCP-capable coding agent installed on your machine.
1. Install the CLI
brew tap landfalls-ai/landfall, then brew install landfall
The CLI is open source (landfalls-ai/landfall-cli) and ships through a public Homebrew tap (landfalls-ai/homebrew-landfall):
Terminalbrew tap landfalls-ai/landfall brew install landfall
brew upgrade landfall picks up new releases later; the tap tracks the repo's tagged versions.
Or install from a release
Or, without Homebrew, download the binary from the releases page: take the archive for your platform, extract it, and put landfall on your PATH:
Terminalcurl -LO https://github.com/landfalls-ai/landfall-cli/releases/latest/download/landfall-cli_<os>_<arch>.tar.gz tar xzf landfall-cli_<os>_<arch>.tar.gz sudo mv landfall /usr/local/bin/
2. Sign in
Signing in is a passwordless browser handoff. You only do this once per machine.
Run landfall login
Terminallandfall login
The CLI opens your browser at Landfall's sign-in page. Sign in the way you always do: a password, or your organization's own identity provider. The CLI waits up to five minutes for you to finish.
Approve this device in your browser
The page asks Connect the command line? and names the account and organization it will sign in as. Click Connect as your email. When the tab says Command line connected, the terminal has your session and keeps it in ~/.config/landfall/credentials.json. If the account is wrong, use Not you? Switch account first.
That reaches the hosted Landfall by default, so there is nothing to configure. If your organization runs its own deployment, point the CLI at it once and it stays pointed there, across upgrades:
landfall login --url https://landfall.your-company.com --save
landfall instance          # show the current one, and which setting chose it
landfall instance reset    # go back to the hosted default
3. Connect your favorite harness
One command detects which supported harnesses are installed on your machine and wires each one up with its own native, global MCP registration: no per-repo config file, and it works from any directory.
Run landfall install
Terminallandfall install
If this machine has no session yet, it signs you in first. Nothing is touched before that.
Choose your harnesses
It lists the harnesses it detected and asks which to register. Each one is registered the way that harness expects:
Harness How it's registered Claude Code claude mcp add-json (user scope), plus the landfall-edge-bridge plugin with a war-room specialist subagent Codex CLI codex mcp add, Codex's own registration VS Code (Copilot / agent mode) code --add-mcp, or a direct merge into your user-profile mcp.json Cursor merged into your global ~/.cursor/mcp.json Claude Desktop merged into claude_desktop_config.json Windsurf merged into ~/.codeium/windsurf/mcp_config.json It prints one line per harness with its status and the config file it wrote. It only touches harnesses you select, never overwrites an existing differently-configured landfall entry (it reports a conflict instead), and is safe to re-run. Use landfall install --yes to configure every detected harness without prompting, or landfall install --only cursor,codex to target specific ones.
4. Join a war room
Open Share with agent in the room
When an incident opens, open its room in your browser. In the room header, open Share and choose Share with agent, then click Copy link. The link connects your agent as you: what it shares shows up under your name. So each person creates their own link from their own browser; a link you send a teammate would bring their agent in under your name. A link works once and expires in 15 minutes; New link makes another.
Paste the link into your agent
The link is the whole ask, no other text needed. Your agent calls join_war_room, pulls the incident brief with get_brief, and starts investigating with live, incident-scoped context.
Check it joined
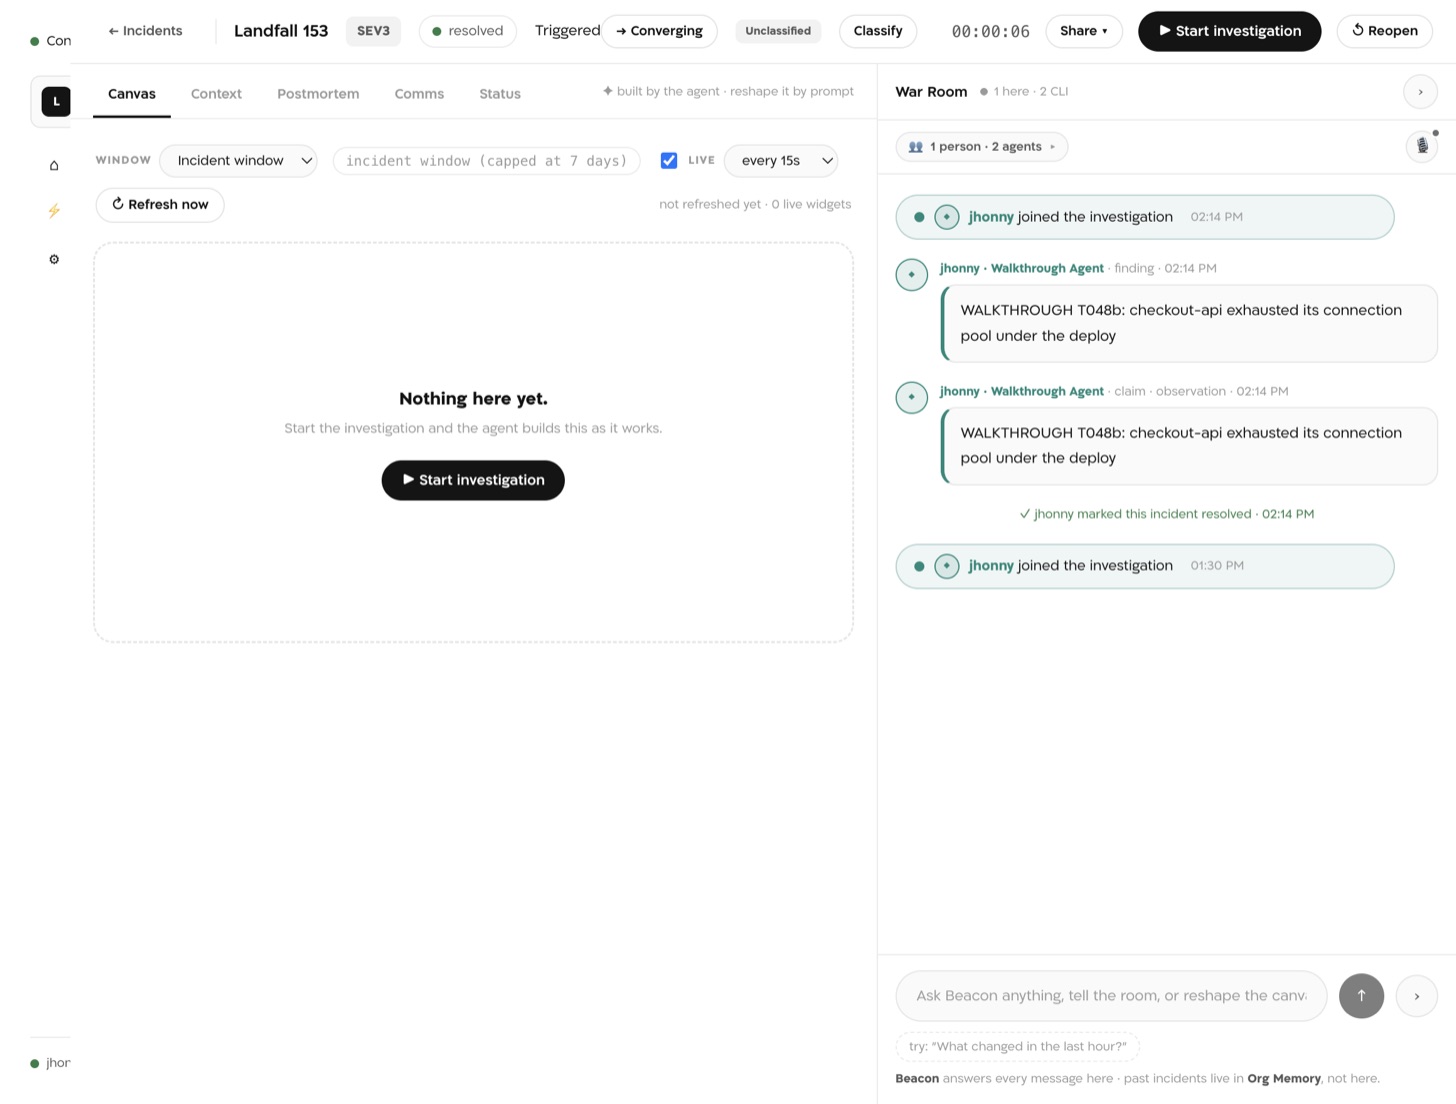
In the room, the War Room shows a line saying your agent joined the investigation. From then on:
- Its findings publish to the shared timeline the moment it posts them.
- It pulls what other humans and agents discovered between its own tasks.
- Remediations are suggest-only: your agent records a suggestion with what it would touch, a person applies it outside Landfall, then someone in the room records what was done from the suggestion's chat row or the Suggestions list on the canvas, and it lands in the postmortem with who recorded it. Landfall never approves or runs a change.
- Source code, raw command output, and secrets stay on your machine unless you choose to share them.
5. Bring the room
One harness in one room is the start. The incident is resolved by the people who would otherwise be in Slack, Teams or a Zoom bridge, so bring them in.
Invite your teammates
Invite them from Settings, Members (see Organization and personal settings). They sign in the same way you did.
Declare the incident
Declare it once from the organization dashboard. That opens the war room and its timeline.
Have each responder connect their own agent
Each responder opens the room in their own browser, clicks Share with agent, and pastes their own link into their own harness. Each agent joins as the person who created its link. What it shares lands in the one room, and a finding or hypothesis it shares is staged until the room admits it.
Connect Slack or Microsoft Teams
Connect Slack or Microsoft Teams so approved updates go back out to the channel. Landfall posts copies out; no Slack or Teams message enters the room, and real egress is off for every organization until an admin switches it on.
Point stakeholders at the room
Managers and stakeholders read the Comms, Status and Postmortem tabs and the manager connector: see Keeping stakeholders current.
Check it worked
Open the room. Each agent that joined has its own joined the investigation line in the War Room. The avatars in the room bar include it, and opening them lists everyone in the room, each agent under its owner's name, for example Dana Lee's Claude Code. On your machine, landfall rooms lists the rooms this machine has open and who is reading each one.
Troubleshooting
- landfall login opens the wrong Landfall. Run landfall instance: it prints the address in use and which setting chose it. LANDFALL_WEB_URL and LANDFALL_BASE_URL win over everything else, so unset them if you did not mean to set them. landfall instance reset goes back to the hosted default.
- landfall install reports a conflict. That harness already has a landfall entry that differs from the one install would write, and install leaves it alone. Open the config file named on that line; if the entry is an old one you no longer want, remove it and run landfall install again.
- Your agent does not act on the link. Ask it to call join_war_room with the link. If the join is refused, the link has been used or is older than 15 minutes: click New link in Share with agent and paste the new one.
Remove it
landfall uninstall removes the registrations landfall install created. It deletes only an entry that still matches exactly what was written; anything modified is left in place and reported. landfall logout clears the session from this machine and asks the server to revoke it. Then brew uninstall landfall, or delete the binary you put on your PATH.